|
Cross Stitch Basics
Welcome to Cross Stitch 101!! Found a cross stitch pattern that’s “Just Perfect!” .... but you don’t know where to begin? .... Well you came to the right place!! Here you will learn all you need to know to complete your first basic pattern. Don’t let the pattern and instructions scare you, once you understand how to make one simple stitch, you should be well on your way to creating a fabulous cross stitch creation!! Soon you’ll be making gifts for everyone you know. First off, there are a few different types out there. Whether they come in a kit or you buy all the components separately. Lets start by looking at some of your options. Three Different Types of Cross Stitch
To purchase any of these types of cross stitch patterns you can go to Embroidery.com or Everything Cross Stitch. Either place has a great selection of patterns and supplies. Ok. Now you know some of the different kinds of cross stitch available, let get to the nitty gritty of how to cross stitch! How to Cross Stitch All of your main stitches will be in the form of an “X”. The only stitches not in that form would be your back stitch, or your specialty stitches. (Couching, French Knots, etc...) I will give you instructions as if you were working from a blank canvas of Aida cloth. That way, you should be able to apply any information I give you to either your stamped or embellished cross stitch projects. If you are using linen, your “squares” will be whatever your project count is. (Example: If I say go from bottom left to top right of square, that would mean bottom left corner of desired area, then count up however many threads, and over however many threads to get to your top right.) Starting your Cross Stitch Project What you need:
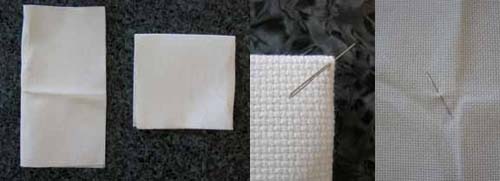
Whenever I start a project, I start in the middle and work my way out. To find the middle of my fabric, I simply fold it in half, then in half again. I insert my pin into the square closest to where the two folds meet. When I unfold the fabric, the needle is sitting in the middle of my fabric. (Careful when inserting your needle. Make sure to only get one layer of fabric. Other wise, you won’t be able to unfold it!!)
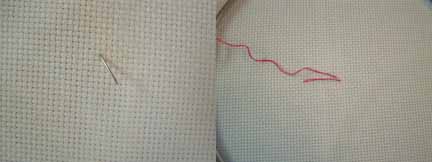
Fold in Half / In Half Again / Up Close / Opened Back Up Once I have found the middle of the fabric, I refer to my pattern. I pick a large section of color that is as close to the middle, if not exactly in the middle, as I can get. (Most cross stitch patterns will have your center horizontal and vertical points marked with either different colored lines, or bolder lines. Need help reading and understanding cross stitch patterns? Click here) That’s going to be my starting point and color. Load the fabric, with needle in place, into your embroidery stand or hoop. I wiggle my needle back and forth to make the center holes Separate out the desired number of floss strands and thread your needle. Make sure to leave a long enough tail of thread that’s not doubled up to work with. Note: Since I work large areas of color at once, I will go across a row making one part of the “X”, then I complete the “X” on my way back. I also use this method to go up, down and diagonal. I leave at least one stitch unfinished on each row, and complete them as I work my way back to my starting point. It saves on embroidery floss usage, and keeps your finished project a little flatter and neater. Also, I’m right handed, so I follow my pattern from left to right. I insert my needle into the bottom left hole of my square, then create the first part of my “X” by inserting my needle into the top right. You can work cross stitch from either direction. Just make sure your direction never changes. (The bottom portions of the “X”s should always be going the same way. The top portions should always be going the opposite direction.) Basic Cross Stitch “X” Stitch The first few stitches of a new piece of floss are the trickiest. Insert your needle, from the back of your work, into the desired starting square or spot in your cloth. Pull thread up through the fabric until the tail in the back is about an inch, or so long. I always work my tails in as I’m going. I do not tie knots in them. (Knots will make your cross stitch lumpy.) I will place the tail so it lays towards the direction I am working. (Center it in your line of stitches so you don’t end up just pulling it back up through your work.) With your non stitching hand, hold that tail in place for the next couple of stitches.
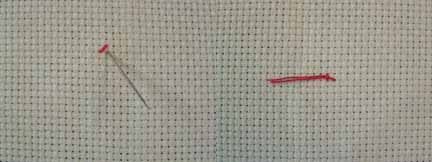
Front / Back Next, insert your needle, from the front of your work, into the next desired spot to make the first part of your “X”. (Careful not to poke your finger!! That really hurts!) Now straight down from that position will be the spot for the beginning of your next square. Insert your needle, from behind, into that hole directly under where you just made your stitch. When you pull your thread tight, you will have formed one half of your “X”. If you held your tail in place properly, it should now be secured by one stitch. Note: When securing your tail, make sure when you come from the front you are above your tail, and when you come from the back, you are below your tail. This locks the tail within the stitches.
Front / Back Repeat this process until you get to the end of your row, or section. At the end, simple come back the other direction, completing your “X”s as you go. (Bottom left to top right, repeat .... then ... bottom right to top left, repeat.) The number of stitches in the row doesn’t matter, the process is the same. Long Row / Short Row 1st Return Stitch Started / 1st Return Stitch Made Again, I am right-handed, so all of my instructions and examples are from a right-handed standpoint. Adjust your direction and starting point to where you feel comfortable. Someone who is left-handed, may have an easier time going from bottom right to top left, and returning by going into bottom left to top right. Some left handed people also find it easier to follow the design from right to left instead of left to right. It really doesn’t matter. Do what is most comfortable for you. The only important thing is to continue whatever direction you choose to go in throughout the entire project. Do not switch directions half way through...you WILL be able to tell. Ending and Starting New Embroidery Floss To finish off a piece of embroidery floss and to start a new one is very simple. Continue stitching until you are finished with the color, or unable to continue making more stitches without the floss coming off of the needle. Your last stitch needs to go to the back of your work. Make sure you finish with the working thread to the back of your project. (If you worked your cross stitch like I do, there will be neat lines of stitches on the backside of your project.) Lay the work flat, and weave your needle underneath those lines of stitches. Pull the needle out, leaving your tail woven snugly under the stitches. (If you worked your cross stitch in “X”s, there will be “X”s on the back, as well. Just weave your tail through them in the same way.) Try to work in your ends with your project and needle as flat as possible. If you pull too hard on the stitches in the back, it tightens that portion of your work in the front, and could even break your thread. If that happens, you will have to unpick enough stitches both directions to re-secure both ends, and add an additional piece of thread in the middle to fill in those broken stitches. And that’s a serious pain!! Continue stitching and changing colors until you have the entire design area completed. Do any backstitching and detail work required by the pattern. At this point, you can add charms, beads or other embellishments to completely finalize your project. Or just to jazz it up and make it more personal. Unwanted Knots Occasionally you will end up with knots in your working thread. This is caused by the twisting of the thread that happens as you stitch. To prevent this, drop your needle and let it spin periodically throughout your stitching. If you do end up with a knot, don’t panic. Until you pull your thread tight, they’re not really “knots” as we know them. They’re actually more of a twisted slip knot. Most of the time you can put your needle through the loop left by the knot, and pull. This will slide the knot up to your needle. Remove your needle from the loop and pull on the thread. The knot will pop right out. Make sure you untwist your thread before continuing to stitch. Sometimes you can get a really stubborn knot. To remove these, you have to loosen the knot itself. Insert your needle into the center of the knot and wiggle the needle. This will usually loosen it enough, that you can use the above process to completely remove it. If it is a REALLY stubborn one, the only thing you can do is cut it out. (I know, I know, I’m sorry. There isn’t much else to do. This isn’t a lot of fun, but it does happen. So drop your needle once in a while!! That will prevent the really nasty ones. I understand, you just get so caught up in your stitching, so do I, but an untwist here and there will prevent major irritations later!!) Once you cut your thread, you’ll have to unpick a few stitches until you can get your needle back onto the tail to tie it in. Cut the knot out of the remaining free piece of thread, and start stitching with the shortened thread. Just pick up where you left off like you started with a whole new piece of thread.
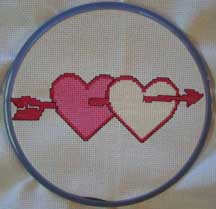
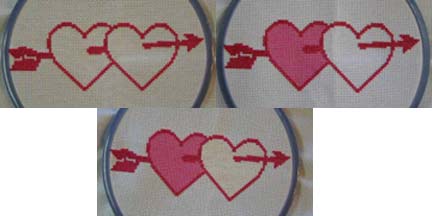
Steps 1 through 3 Complete If you would like a copy of this pattern, click here to download the pdf version. Backstitching is usually done once all your other stitches are completed. Sometimes a pattern will call for you to backstitch a section before moving on to give you different effects. The number of strands used to stitch with will determine how thick your finished lines will be. Most of the time, 1 or 2 strands are used for backstitching. I have done patterns that call for a stronger main outline, and lessor detailing lines. Those patterns required 3 and 4 strands for the stronger lines, and 1 and 2 for the lighter detail lines. This is the basic stitch used to outline and define your cross stitch. It is a very basic line stitch. Start by inserting your needle, from the back, where you would like to start your line. Pull through. (Make sure to leave your 1” tail. Try to catch it within your stitches as you go.) Insert your needle, from the front, into the next stitch. Pull tight. You will now have one line stitch made. Insert your needle, from the back, and come up where you want the next stitch to end. Pull tight. Insert your needle backwards into the end of the first completed stitch. You just connected your two stitches. Come Up From Behind / Back Down To Complete Stitch This is why it is call a back stitch. You will actually have to stitch backwards from here on out to finish each stitch. Note: Back Stitching in crochet and hand embroidery are basically Hearts Pattern Complete with Backstitching Other Stitches Used in Cross Stitch That is all you really need to know to get started with your first cross stitch project. Very simple “X” and line stitches. But as you get into the more advanced patterns, you’ll need to know a few more stitches. Framing and Finishing Your Project Once you have all your stitching, finishing and embellishing done, it’s time to decide what to do with the project. Sometimes you already have a plan for your cross stitch project when you start. But if you’re like me, you probably don’t. You just wanted to cross stitch. There are lots of things you can do with your finished project. You can frame it, or have it professionally framed, and let it stand on its own. Or you can make it into something else, like a pillow, a blanket, a center piece of a different craft project, etc... The list just goes on and on. Only your imagination can limit the possibilities. Let’s say you want to frame it. You need to secure the edges so they don’t fray and ruin all your hard work. There’s a couple of ways to go about doing that.
To give your framed cross stitch project a different look, you could add some batting. That will give it a puffy look. Eliminate the glass, and your stitches could actually POP out of the frame! Ever heard of fabric boards? My friend “frames” some of her smaller cross stitch projects in them. They are foam blocks that you trace out a design on, make slices into the foam, then fit your fabric scraps into the pattern pieces. You basically get to create your own puzzle with fabric!! My friend uses her cross stitch design as the center piece. They end up looking great! There are so many ways you can finish your cross stitch projects. Any way you can dream up to use a decorative piece of fabric, you can use your finished project instead. A finished cross stitch makes a great gift, too. (Just be careful, once you start making them and giving them away, EVERYONE wants one! Then again, never mind. That will just give you all the excuses you need to spend LOTS of time cross stitching!!) Click here to download the pdf version of my cross stitch pattern. Happy Stitching!! Return to Hand Embroidery Stitches ♥♥♥♥♥♥♥♥♥♥♥♥♥♥♥♥♥♥♥♥♥♥♥♥♥♥♥♥♥♥ Want to ♥♥♥♥♥♥♥♥♥♥♥♥♥♥♥♥♥♥♥♥♥♥♥♥♥♥♥♥♥♥ Return to Embroidered Gifts
|


